Enjoy uninterrupted exposure to your Store
PriceCheck has introduced a new automated monthly top-up function that has been built into your Merchant Dashboard.
Why should I choose Automated Top-ups?
- Auto top-up has been set up in a way that still allows you to stay in control of your monthly budget allocated to PriceCheck but ensures that you maintain a live status during the most important time of the month – after payday.
- Auto top-up will alleviate the administration of constantly having to manually top-up and most importantly, saves bank costs you would normally incur doing multiple smaller top-ups.
- Having automatic top up in place also ensures that your store can enjoy uninterrupted exposure and will always be “online” – helping your shop to receive trusted shop status.
Step-by-Step Guide on how to set up Auto Top-up:
- Log in to the admin interface.
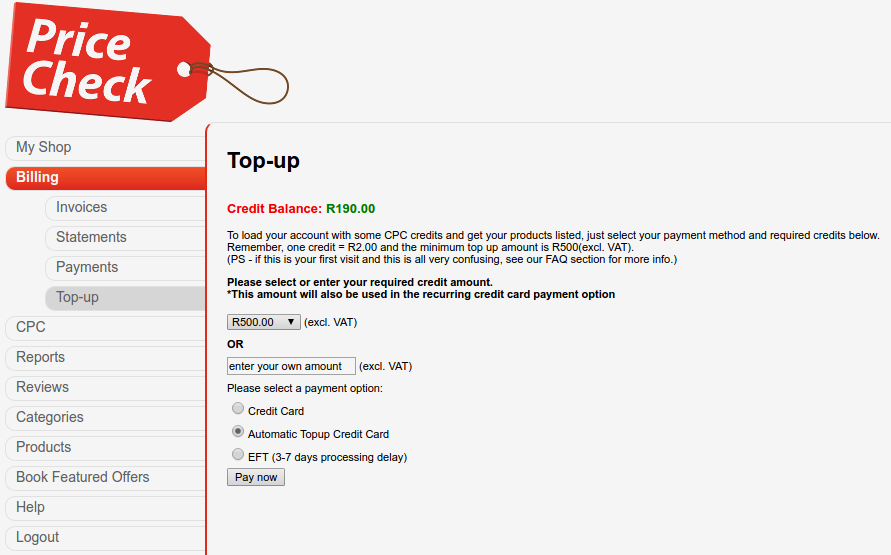
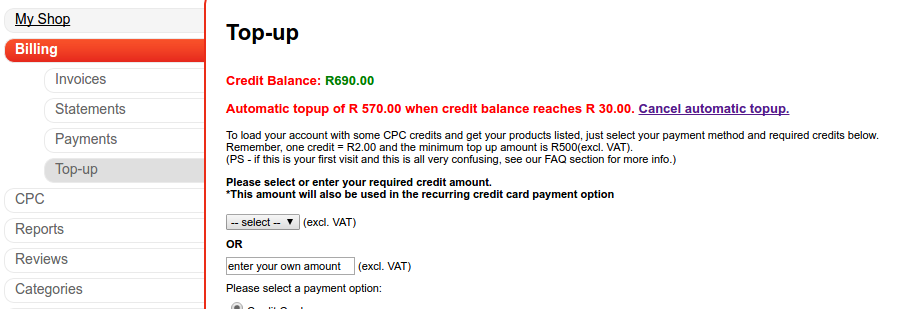
- From the left-hand side menu, select Billing > Top-up.
- Select or enter an amount to be used for the monthly top-up.
- This amount will be deducted when the threshold is reached – this is specified in step 4.
- Select the payment option Automatic Top-up Credit Card, and click the Pay now button.
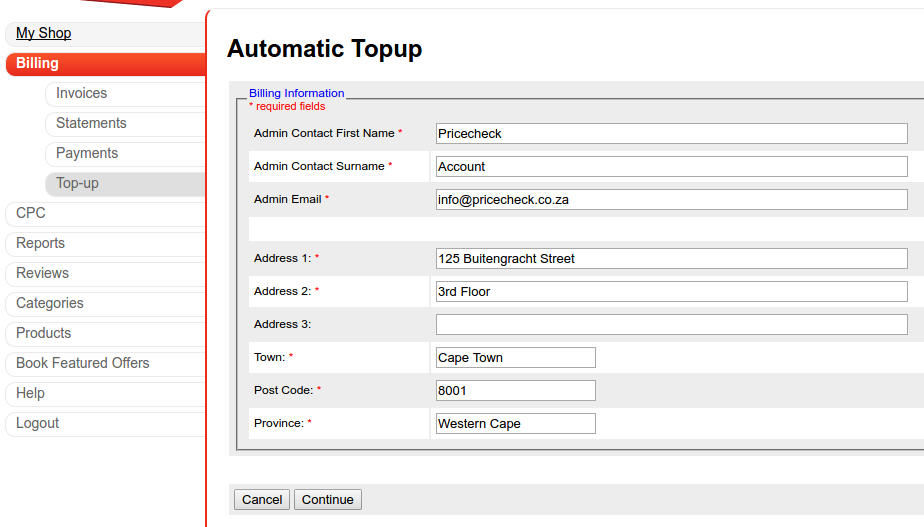
- A form with all the billing information will be displayed – the *fields are required for us to process the payment.
- After all the fields are filled in, click Continue to navigate to the payment form, or “cancel”.
- Configure the automatic top-up and Continue.
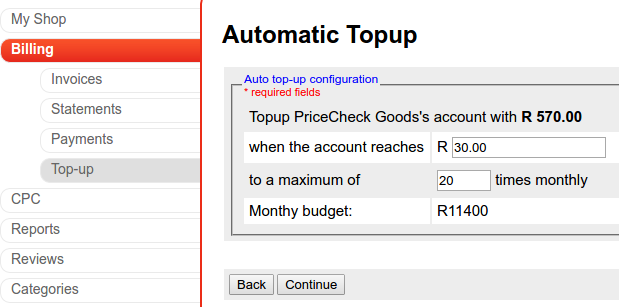
– Specify the threshold – in this case the threshold is R30, and the account will be topped up when the account reaches 30 credits.
– Maximum times of top-up – this is the maximum PriceCheck will perform an automatic top-up on the shop’s behalf. The monthly budget is calculated by multiplying the top-up amount * the maximum top-up times specified. *Note – this excludes the initial payment.
– The monthly cycle is from the 20th to the 19th of the next month (not the 1st to the end of the month). - Fill out the payment form and wait for a response.
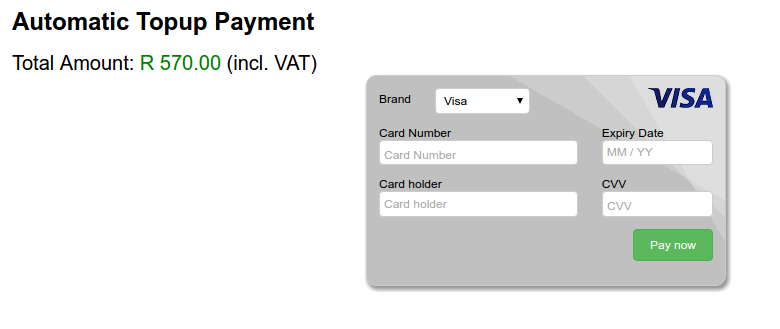
- Once the payment is received the following screen will appear:
Note: an initial payment is required to do the automatic top-up

How to cancel your top-up:
- Go to Billing > Top-up
- If there is an active automatic top-up, there will be a line of text stating the top-up. At the end of the line click on Cancel automatic top-up.
- Confirm the cancellation of the top-up on the next screen.
- The top-up is now cancelled, and will not display on the initial top-up screen anymore.

Pingback: How to Optimise Your Selling Potential | PriceCheck Help
Pingback: Shop Suspension | PriceCheck Help
Pingback: Beginner’s Guide to listing on PriceCheck Cost Per Click – PriceCheck Help